


Setting up an encrypted Time Machine backup stored in the cloud
Warning: This is more-or-less for setting up an off-site non-critical redundancy for peace of mind and is not a replacement for an immediately available on-site backup. If you are working on mission-critical work, please invest in a decent NAS or high quality USB 3.0 storage drives
TL;DR: Create a sparsebundle disk image, create a Cryptomator encrypted drive, set Time Machine backup to mountpoint of disk image, run first backup, unmount disk image and move it to Cryptomator drive, mount Cryptomator drive automatically on boot and write a script that mounts the disk image from the Cryptomator drive on login
I found myself in the need of backing up my macOS Install. I am a happy hackintosher who likes playing with macOS just as much as the next guy, but I found that my installation of a Kaspersky product would cause the machine to crash an unusual number of times.
And while the problem was apparently a misbehaving kav kext, I found that I am in the need of a good backup system. Most of my development work is backed up and so is most of my music. So with my install which I have painstakingly customised to my liking (as a former Windows user who used to love playing with Stardock product trials and Rainmeter), I couldn’t afford to lose my custom .bash_profile or my iTerm, Ferdi, Live and Audio Hijack configurations or re-license all my software.
I primarily use Carbon Copy Cloner (absolutely amazing tool) but this time I needed something that allowed me to go back in time, maybe a Time Machine :)
I have a few external drives that don’t work most of the time lying around (except my trusty WD 500GB drive, which can do no wrong) so I figured, let me back it up to the cloud.
One problem, client-side encrypted cloud storage is expensive. The solution? Cryptomator! But Cryptomator drives report themselves as Crypto File System (OSXFUSE) and Time Machine only works with HFS+ (Journaled).
The solution? Nested disk images.
Things you need⌗
-
Homebrew
-
An internet connection
-
Storage space, lots of it, outside your boot partition.
Creating your encrypted virtual drive⌗
Presuming you have Homebrew installed (if you haven’t, go here), open your terminal and run
brew cask install cryptomator osxfuse
Presuming you had a successful install and appropriate kext permissions (if prompted) were granted at System Preferences > Security and Privacy > General, launch Cryptomator.
You will be greeted by a cute green robot, now let’s get to work
-
Click on the Add Vault button
-
A dialog will pop-up, click on Create new vault, give it a name (preferably one word) and create it in a location that is accessible by your cloud syncing software (and isn’t on your boot drive) by clicking on custom location and selecting a directory
-
Enter a password (preferably saved by a password manager like KeePass) and save the recovery key somewhere safe. Now click on Create Vault
-
Click on Done (we aren’t unlocking it just yet, we need to do one more thing)
-
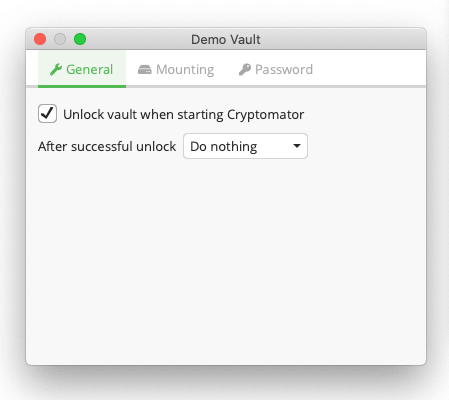
Click on your newly created vault and go to Vault Options and ensure that it looks something like this:
- Now, unlock your new vault, you should find a
WELCOMEdocument! (as of Cryptomator 1.5.5)
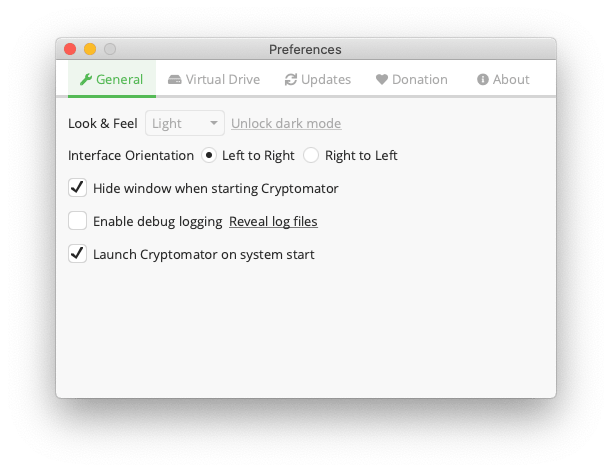
Now go to Cryptomator and ensure your preferences look something like this.
We need to go back to our terminal and find out the mount point of our encrypted volume
$ ls /Volumes/

3GHFglmcsHBY_0                Macintosh\ HD
You will find some gargled obfuscated phrase like 3GHFglmcsHBY_0, this is our _ENCRYPTED_VOLUME_NAME_, your regular _VOLUME_NAME_ is the name you entered during the setup stage.
Creating the disk image and setting up Time Machine⌗
We now have our encrypted drive! Time for making our HFS+ disk image within our encrypted drive.
Create our disk image. The benefit of a sparsebundle is that it will only use
as much space as it needs, so it doesn't use all 500GB (which is the size taken
here) and in fact will only fill to your disk capacity (or maximum) disk image
size, whichever one is lower
$ hdiutil create -size 500g -library SPUD -fs HFS+J -type SPARSEBUNDLE -volname "TimeMachine" /Volumes/_ENCRYPTED_VOLUME_NAME_/TimeMachine.sparsebundle
Let's introduce macOS to our disk image
$ open /Volumes/_ENCRYPTED_VOLUME_NAME_/TimeMachine.sparsebundle
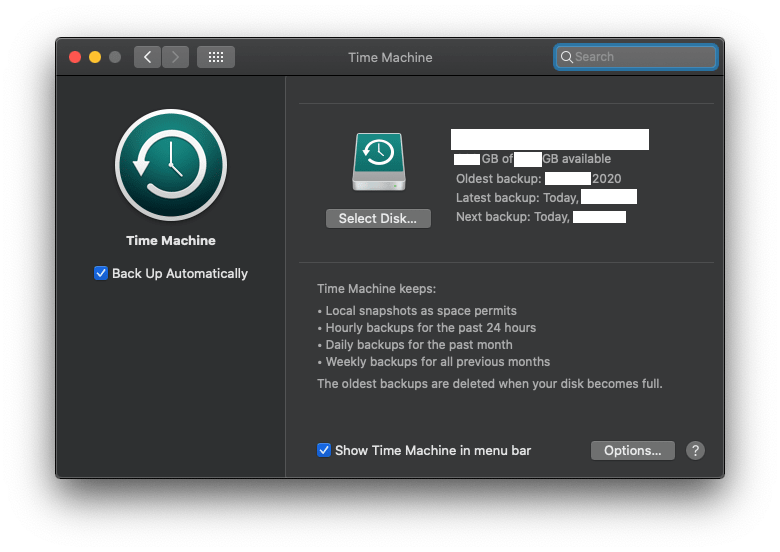
Now, we tell Time Machine to use our new disk image as its default backup point
$ sudo tmutil setdestination -p /Volumes/TimeMachine
We’re not done yet. We still need to tell Time Machine to backup only our boot drive. (Otherwise, it will try to backup the drive hosting the Time Machine backup, which is not good)
Go to System Preferences > Time Machine > Options and exclude everything that isn’t your boot drive. Now, backup away! This will take a lot of time so you can continue with your daily tasks.
(Tip: If you want to speed things up, you can create the sparsebundle on your normal drive, let it complete the first backup as that is the longest and then shift it to the encrypted volume)
Setting up cloud syncing is a matter of service preference and a matter of the tools that you use for syncing and is therefore outside the scope of this blogpost.
Creating our auto-mounting script⌗
Here, _VOLUME_NAME_ is volume name and _ENCRYPTED_VOLUME_NAME_ is encrypted volume name. Open up our trusty Script Editor and paste this script. Change values as needed.
tell application "Finder"
    if not (disk "_VOLUME_NAME_" exists) then
        run application "Cryptomator"
        delay 5
    end if
end tell

do shell script "hdiutil attach /Volumes/_ENCRYPTED_VOLUME_NAME_/TimeMachine.sparsebundle"
When you’re done, unmount everything (the TimeMachine volume and the encrypted drive) and close Cryptomator by going to the icon tray, selecting Cryptomator and clicking Quit. Now, to test the script, click on the Play (Run the Script) button
Does everything work? Good! Now go to File > Export and select type as Application and store it in your Applications directory.
Ensuring that everything works on login⌗
Go to System Preferences > Users and Groups > Login Items (click the lock to allow changes and so on..) and then click on the Add (+) button and select our newly created application.
We’re done! Yay!