


Setting up a UNIX-style native environment on Windows, ZSH, keyboard shortcuts and more…
When I found myself with a triple-boot setup, switching between macOS, Manjaro and Windows 10. I found that there were habits that I learned when using any one of those three operating systems for a long time so switching to another platform abruptly, caused a period of disruption and mild irritation to say the least.
I can’t have bash or zsh on Windows by default (and no, I’m not using WSL because that’s cheating, it’s a compatibility layer and I’m basically running two userspaces which creates problems See the idiosyncrasies of WSL documented by the Bitcoin project and a WSL2 bug that’s really annoying)
I had to fight my muscle memory, because on Windows Ctrl + Q doesn’t mean anything because of course you’re supposed to use Alt + F4 and on macOS, I can’t open the terminal using Ctrl + Alt + T like I can on Manjaro. Windows needs cd /d because just cd doesn’t do it and ls doesn’t exist because I’m supposed to use dir instead. macOS doesn’t have Ctrl + Alt + Del and the Home and End key behave differently for some reason.
So, I’ve had it. This is first in a three part series where I make Windows more like macOS more like Manjaro more like macOS more like Windows. So, let’s first start with things that aren’t present in Windows that I sorely miss and how I resolved them.
Additional Reading⌗
- Borek Bernard’s zsh on Windows via MSYS2
- angelog0’s reply on Issue #1684 (Using MSYS2 in Windows Terminal)
- Run scripts as administrator? - AutoHotkey Community
- OS X Like - Windows with MAC keyboard - AutoHotkey Community
- Check if process is running - AutoHotkey Community
- “clear” broken on Windows when using with Git BASH - Issue #1559
Windows, Package Managers and sudo⌗
Windows doesn’t come with a package manager. Windows also doesn’t have an equivalent for sudo, a tool that I take for granted on macOS and Manjaro. If you want an elevated prompt on Windows, you are forced to move to the Windows logo on the bottom left, right click and open a dedicated Command Prompt (Admin) instance , if you want to just run an elevated command in a non-elevated prompt, you’re SOL.
Let’s kill two birds with one stone. For the first and last time, open a privileged PowerShell console window (if you get Command Prompt (Admin) instead, open that, grant UAC permissions and type powershell) and install the Chocolatey Package Manager.
Set-ExecutionPolicy Bypass -Scope Process -Force; [System.Net.ServicePointManager]::SecurityProtocol = [System.Net.ServicePointManager]::SecurityProtocol -bor 3072; iex ((New-Object System.Net.WebClient).DownloadString('https://chocolatey.org/install.ps1'))
Follow the prompts and soon you should have a package manager at your disposal. Now, let’s install gsudo so I never have to spawn another console window again.
choco feature enable -n allowGlobalConfirmation # To suppress confirmations
choco install gsudo
You can try it out by opening an unprivileged console window and typing sudo powershell and you’ll be dropped in to a privileged PowerShell instance without spawning a new console window. Use this freedom to chkdsk at will without get mildly pissed that you forgot to run a privileged instance.
Bringing (some) macOS keyboard shortcuts to Windows⌗
I prefer Ctrl + Q to Alt + F4 and I’ve come to miss the absence of Ctrl + W (and yes, I said Ctrl instead of Cmd (⌘) because I use a cheap PC keyboard and swapped the Ctrl and Cmd keys on macOS). To get your fix of keyboard shortcuts, the first thing you need is AutoHotKey.
Installing it is much easier now since we have a package manager!
sudo choco install autohotkey
Now that we have AutoHotKey installed, we can run notepad "%AppData%\Microsoft\Windows\Start Menu\Programs\Startup\macOSKeys.ahk", answer Yes to the prompt when it asks us if we want a new file and get going.
There’s a mild inconvenience I need to let you know about, though. In order for AutoHotKey to control the shortcuts in other open windows and privileged programs, the script itself needs to be run as administrator. To enforce that, you need to add this little snippet at the top of your script.
#SingleInstance Force
SetWorkingDir %A_ScriptDir%
if not A_IsAdmin
	Run *RunAs "%A_ScriptFullPath%"
Now that we’re done with that, you can use paste this script and save your file.
; Alt tab for windows with CMD key
Ctrl & `::ShiftAltTab
Alt & `::ShiftAltTab
Ctrl & Tab::AltTab

; open Windows start with shortcut for Finder
; Ctrl & Space::Send {Ctrl up}{LWin}

; Tab back with special key below ESC
; Ctrl & `::Send {Shift down}{Ctrl down}{Tab}{Ctrl up}{Shift up}
; Alt & `::Send {Shift down}{Ctrl down}{Tab}{Ctrl up}{Shift up}

; F3 (expose key) = Widnows 10 expose
F3::Send {LWin down}{Tab}{LWin up}

; Windows 10 - plochy: CMD + Option + Left/Right
#If GetKeyState("RCtrl", "D")
    Alt & Left::Send {RWin down}{Ctrl down}{Left}{Ctrl up}{RWin up}
    Alt & Right::Send {RWin down}{Ctrl down}{Right}{Ctrl up}{RWin up}
#If

; Option + tab = Ctrl + Tab
!Tab::Send {Ctrl down}{Tab}{Ctrl up}
!+Tab::Send {Shift down}{Ctrl down}{Tab}{Ctrl up}{Shift up}

;Command-backspace deletes whole line
Ctrl & BS::Send {LShift down}{Home}{LShift Up}{Del}

;alt-delete deletes previous word
!BS::Send {LShift down}{Ctrl down}{Left}{LShift Up}{Lctrl up}{Del}

; Navigation of smaller chunks (skip word)
!Left::Send {ctrl down}{Left}{ctrl up}

Alt & Left::Send {ctrl down}{Left}{ctrl up}
!Right::Send {ctrl down}{Right}{ctrl up}
Alt & Right::Send {ctrl down}{Right}{ctrl up}

; Navigation using of bigger chunks (Skip to start/end of line/paragraph/document)
^Left::Send {Home}
^Right::Send {End}
!Up::Send {ctrl down}{Up}{ctrl up}
!Down::Send {ctrl down}{Down}{ctrl up}
^Up::Send {Lctrl down}{Home}{Lctrl up}
^Down::Send {Lctrl down}{End}{Lctrl up}

; Selection (uses a combination of the above with shift)
<!+Left::Send {ctrl down}{shift down}{Left}{shift up}{ctrl up}
<!+Right::Send {ctrl down}{shift down}{Right}{shift up}{ctrl up}
^+Left::Send {shift down}{Home}}{shift up}
^+Right::Send {shift down}{End}}{shift up}
!+Up::Send {ctrl down}{shift down}{Up}}{shift up}{ctrl up}
!+Down::Send {ctrl down}{shift down}{Down}}{shift up}{ctrl up}
^+Up::Send {Lctrl down}{shift down}{Home}}{shift up}{Lctrl up}
^+Down::Send {Lctrl down}{shift down}{End}}{shift up}{Lctrl up}
; small selection
!+Left::Send {ctrl down}{shift down}{Left}{shift up}{ctrl up}
!+Right::Send {ctrl down}{shift down}{Right}{shift up}{ctrl up}

#If GetKeyState("Alt", "D")
    LShift & Left::Send {ctrl down}{shift down}{Left}{shift up}{ctrl up}
    LShift & Right::Send {ctrl down}{shift down}{Right}{shift up}{ctrl up}
#If

Ctrl & w::Send ^{F4}
Ctrl & q::Send !{F4}
I would suggest running explorer "%AppData%\Microsoft\Windows\Start Menu\Programs\Startup\" and create a desktop shortcut for the script so that you can launch it if you forget to grant UAC permissions during login.
Spotlight, Quick Look and getting it all on Windows⌗
While it isn’t a perfect Spotlight replacement, PowerToys Run (a fork of Wox) comes close. Installing it is as simple as running sudo choco install powertoys . Once you have it installed, run it and double click the PowerToys icon in the tray.
Go to PowerToys Run and enable it, then remap the shortcut from the default Alt + Space to Ctrl + Space, tweak whatever you feel like and you’re good to go
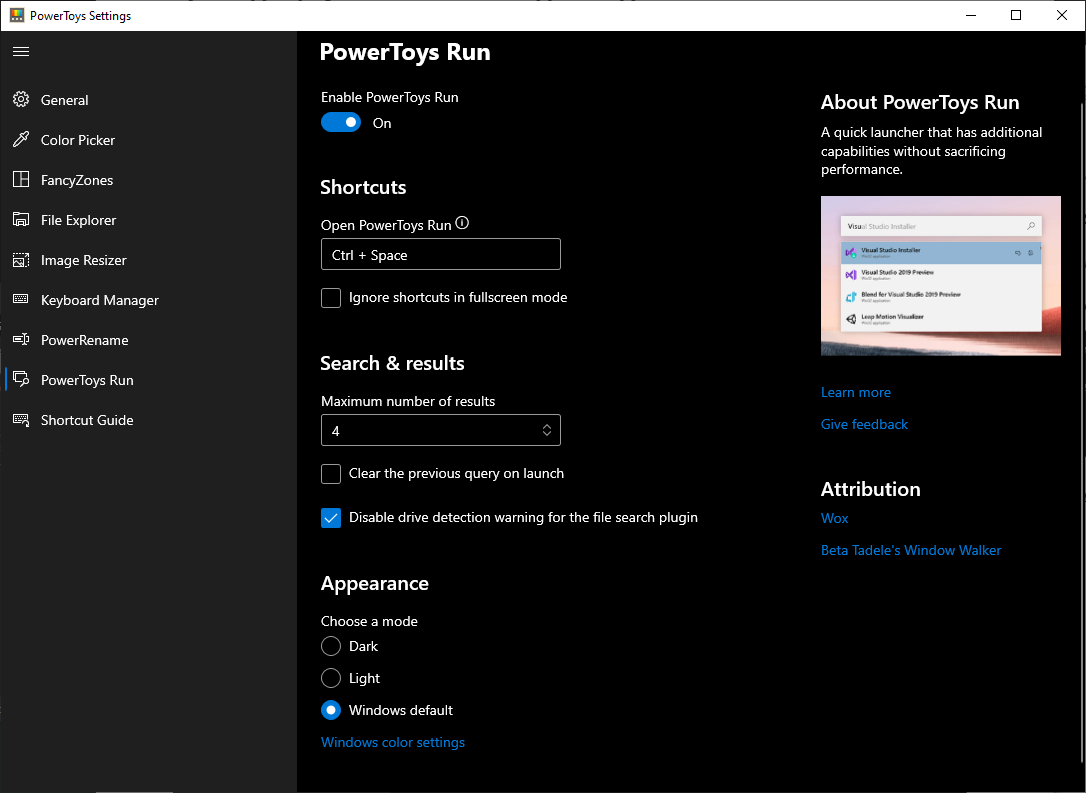
P.S.: You should probably disable Shortcut Guide and FancyZones if you have no use for them
As for Quick Look? Install the cleverly named QuickLook with sudo choco install quicklook and check out their plugins page to preview Microsoft Office documents and much more if that’s your thing. It’s also recommended that you look for the QuickLook icon in the tray and enable Run at Startup to ensure that you don’t have to manually launch it every time you reboot.
A native-ish UNIX-style POSIX environment⌗
Most guides about getting zsh or bash involve WSL (I use WSL, mind you, it’s pretty neat but it’s not what I’m looking for here, I’m looking for a native shell interpreter). Well, with MSYS2, you can finally come a step closer to achieving that.
First things first, you need to decide where to install MSYS2, a usual place to install it is c:\msys2 but I would recommend installing it on a non-boot drive but also, keeping its path simple and free of spaces.
Another thing to note is since unlike macOS and Linux-based distributions, Windows uses \ as a path separator instead of /, but across all three platforms, \ is also used to escape characters so whenever using the \ separator, use \\. (For example, D:\MSYS2 will be written as D:\\MSYS2). That being said, install MSYS2 from their website and once installed, navigate to the install location and run msys2_shell.cmd
You will be greeted with an MSYS2 console prompt.
Configuring MSYS2⌗
Most commonly, people use a friendly fork of MSYS2 called Git Bash for Windows but we’ve resorted to using the parent system itself so we get access to additional features. That being said, Git for Windows maintains a lot of useful Git-related repos so to set it up, we need to add the server location to /etc/pacman.conf
echo "[git-for-windows]" >> /etc/pacman.conf
echo "Server = https://wingit.blob.core.windows.net/x86-64" >> /etc/pacman.conf
Download the GPG key and add it to MSYS2’s package manager (fun fact, it’s ported from Arch Linux)
curl -L https://raw.githubusercontent.com/git-for-windows/build-extra/master/git-for-windows-keyring/git-for-windows.gpg |
pacman-key --add - &&
pacman-key --lsign-key 1A9F3986
Now as it is customary for any new install, update all your repository databases and upgrade any preinstalled packages.
pacman -Syyu
MSYS2 is pretty barebones so to make our life easier (and to ensure that our scripts actually run), let’s install some basic tools that come with a Linux-based standard install.
pacman -S man vim emacs nano wget curl  \
		cmake ninja nasm gcc rsync openssh \
		parallel axel zip unzip gzip ruby \
		python3 p7zip pactoys \
		mingw64/mingw-w64-x86_64-jq
Install our Git-specific packages (we’re using pacboy, that’s why we installed pactoys)
pacboy sync git:x git-credential-manager:x git-lfs:x git-doc-html:x git-doc-man:x
And just to ensure that OpenSSH behaves properly
sed -n -i '/db_home/!p' /etc/nsswitch.conf && \
echo "db_home: windows cygwin desc" >> /etc/nsswitch.conf
Since we’ve upgraded packages and changed a lot of settings, it’s best to shut down this console window.
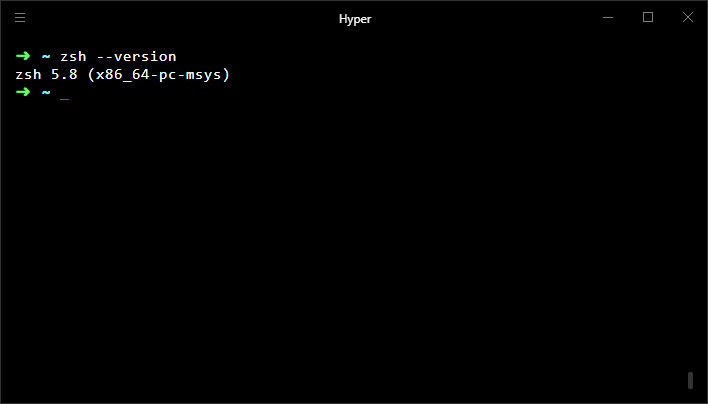
Setting up Hyper and using Mingw64⌗
Open a plain Command Prompt instance and install Hyper using sudo choco install hyper (a console emulator I prefer over Cmder though you could in theory use any other program and adapting this guide according).
After Hyper has successfully installed, we need to inform Hyper that we’re interested in running our Mingw64 instance instead of MSYS2 or the Windows Command Prompt. To do that, we can edit Hyper’s configuration file, .hyper.js by running notepad %AppData%/Hyper/.hyper.js.
    shell: '[MSYS2_INSTALL_LOCATION]\\usr\\bin\\zsh.exe',
    shellArgs: [
      '--login',
      '-i',
      '-l'
    ],
    env: {
      'TERM': 'cygwin',
      'MSYS2_PATH_TYPE': 'inherit',
      'HOME': 'C:\\Users\\[INSERT_USERNAME_HERE]',
      'CHERE_INVOKING': '1',
      'MSYSTEM': 'MINGW64'
    },
I would also recommend changing the letterSpacing to 1 and fontSize to 15 but that’s up to your personal preferences.
Mapping Hyper to Ctrl+Alt+T⌗
You can use the same steps as described for configuring macOS-style keyboard shortcuts to create a new script or simply edit our previous script itself and paste this at the bottom of the script. Reload it by searching for the AutoHotKey logo, right click and Reload this Script
^!T::
SetTitleMatchMode, 2
Process, Exist, hyper.exe
if !ErrorLevel = 0
{
    IfWinNotActive, Hyper,
    WinActivate, Hyper,
    WinWaitActive, Hyper,
    Send, ^+T
}
else
{
    Run "%LOCALAPPDATA%\hyper\hyper.exe"
    WinWait, Hyper,
}
return
Setup ohMyZsh⌗
Use Ctrl+Alt+T to open a new console window and run
sh -c "$(wget -O- https://raw.githubusercontent.com/ohmyzsh/ohmyzsh/master/tools/install.sh)"
I would recommend installing some ohMyZsh plugins by editing ~/.zshrc and adding these (you will need to install fzf for zsh-interactive-cd, instructions are on their repo)
plugins=(
        git
        zsh-interactive-cd
        sublime-merge
        ssh-agent
        history
        github
        gitignore
        cp
)
Additional Notes and Bugs⌗
-
For some reason
gitdoesn’t precisely behave correctly, I’m finding myself using/usr/bin/gitto clone repos and don’t know why it’s misbehaving -
You can no longer use Hyper to launch a WSL instance using
bashas you’ll just end up launching Mingw64’sbash. To launch your WSL instance, runwslinstead. -
The
chocopackage manager seems broken when running withinzshorbash, please usecmdorpowershellbefore running choco specific commands. -
You can modify your user’s local
%PATH%variable and add[MSYS2_INSTALL_LOCATION]\mingw64\binto access those UNIX utilities in the Command Prompt.